

Occasionally, a classic black and white illustration is the most effective way to communicate an idea. This straightforward technique saves you the hassle of configuring material nodes. Simply follow the instructions, capture a screenshot of your work, and refine it in Photoshop.
Set your Viewport Shading to Solid Shading (Flat) with the following settings
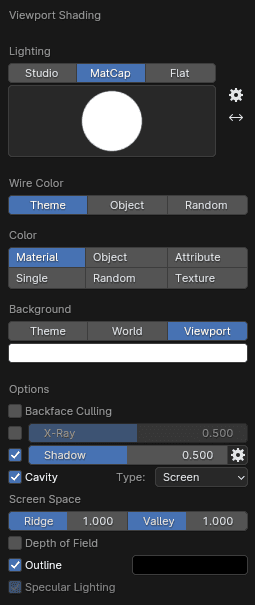
Manually set your materials’ Viewport Display settings so that they appear at the desired colors in the viewport
To copy and paste a color between materials, hover over the color window, press CTRL+C (no need to click), then navigate to the other material and press CTRL+V in its color window. Keep in mind that the fewer colors, the better. Try to stick to black (or values of grey) and white.
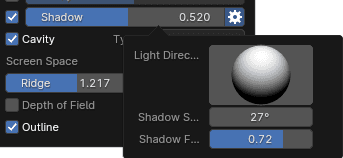
Tweak the cell-shading effect via the shadows menu
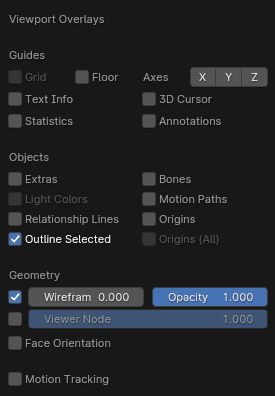
To have additional dramatic ’construction’ lines, set your Viewport Overlays
Screenshot (Win + Shift + S) and polish in Photoshop.

